# Cloudflare
## **Getting Started**
Before we begin, let’s make sure you have everything you need to setup your custom domain.
* A Cloudflare Domain
* A BotPanel bot with any tier of [BotPanel Pro](https://dashboard.botpanel.gg/pro)
## **Configuring DNS on BotPanel**
{% stepper %}
{% step %}
Login into the [BotPanel Dashboard](https://dashboard.botpanel.gg/panel/dns) and select the bot to which you would like to add the domain.
{% endstep %}
{% step %}
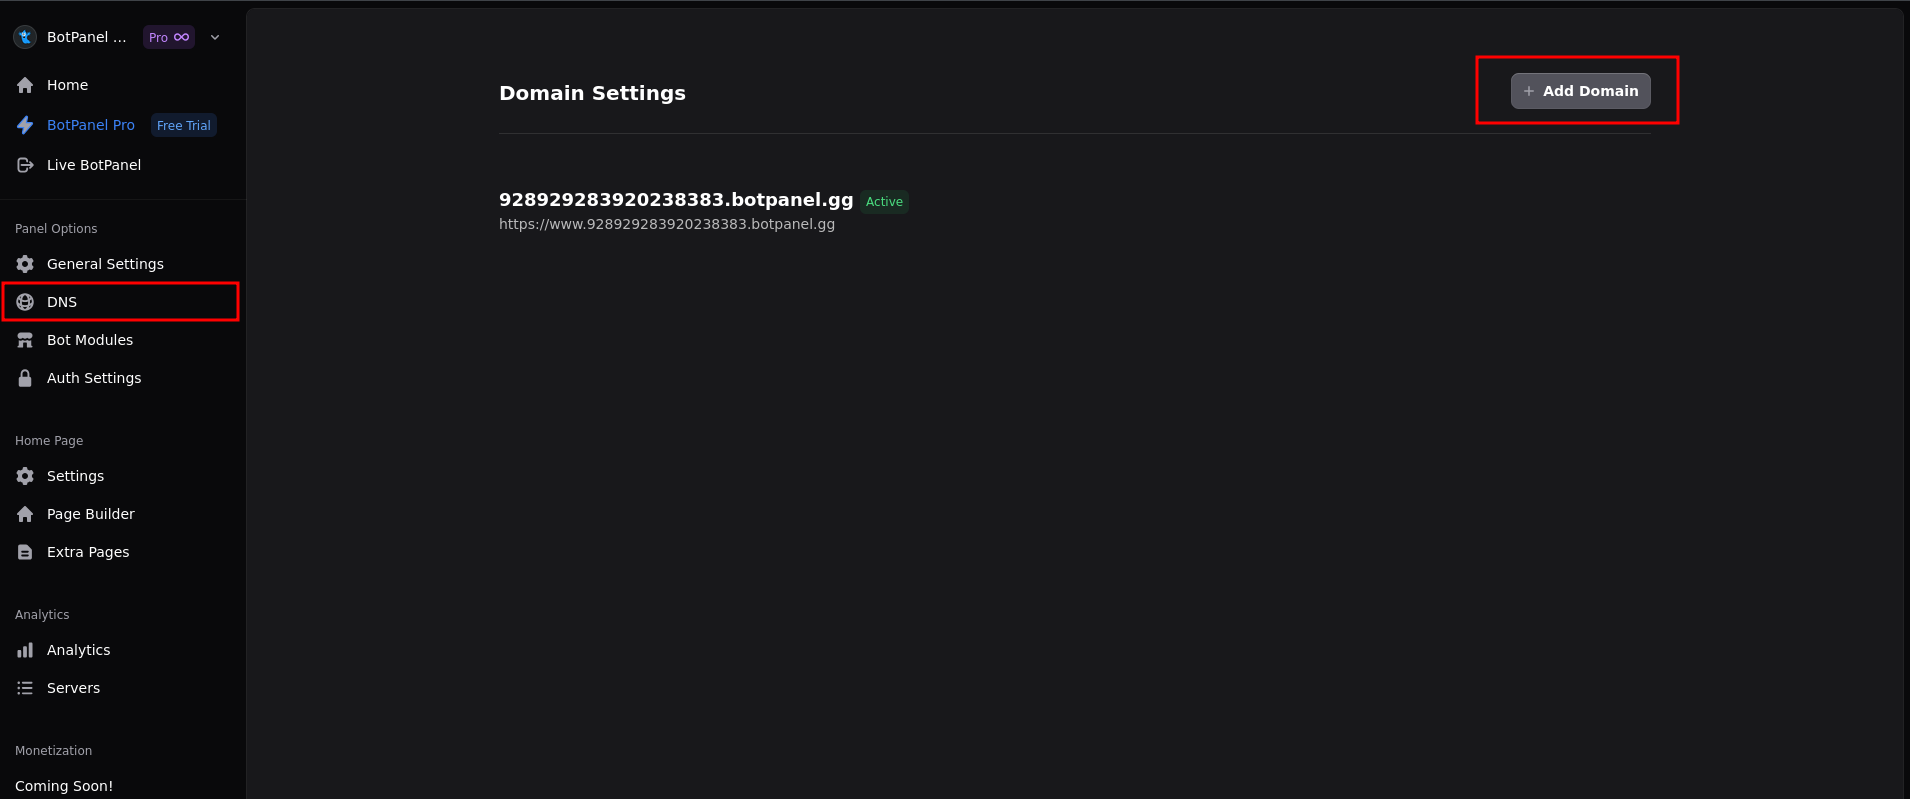
Visit the DNS tab on the side menu and click the Add Domain button.
{% endstep %}
{% step %}
You will be prompted with an option to buy the domain via our partner NameCheap, or if you have already purchased a domain on NameCheap. Select one of the options and continue. If you need to buy a domain, please visit the [namecheap](https://docs.botpanel.gg/domain-setup-guides/guides/namecheap "mention") page instead.

{% endstep %}
{% step %}
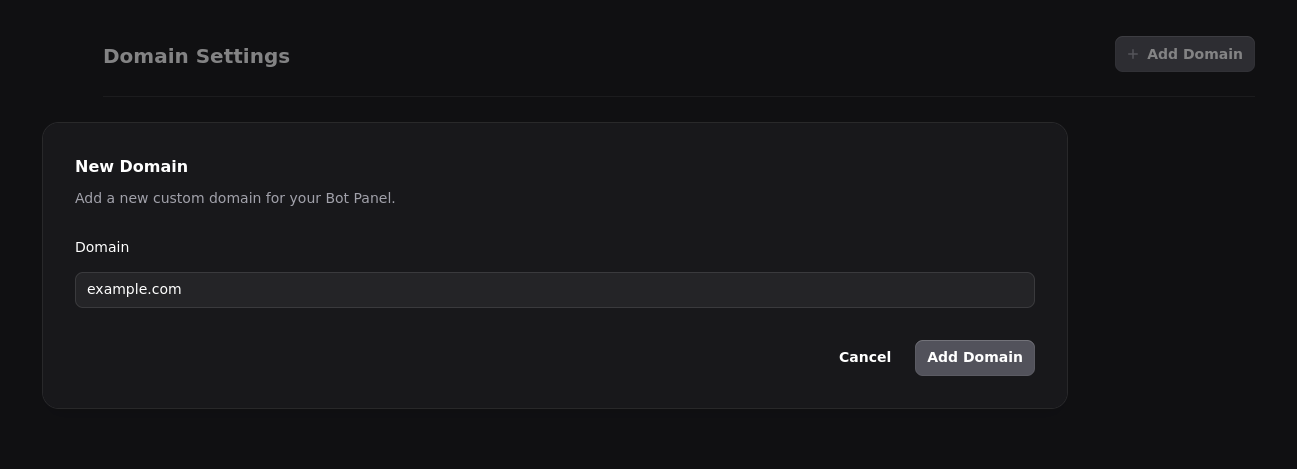
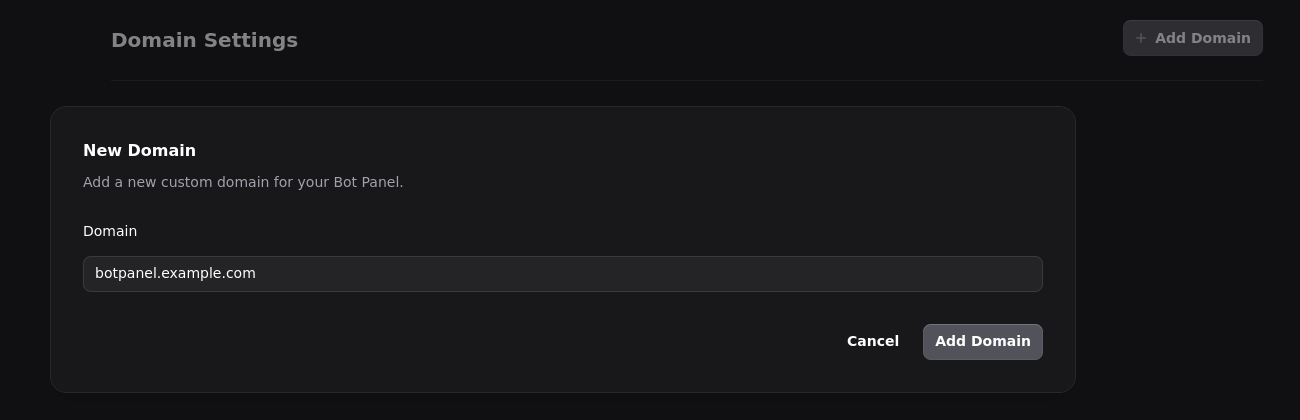
You will have to provide your domain or a subdomain you would like to add ( the one that you’ve purchased or linked to Cloudflare ) and click the Add Domain button.
Using the domain:
Using a subdomain (example):
Upon adding your domain:

Using a subdomain:
{% endstep %}
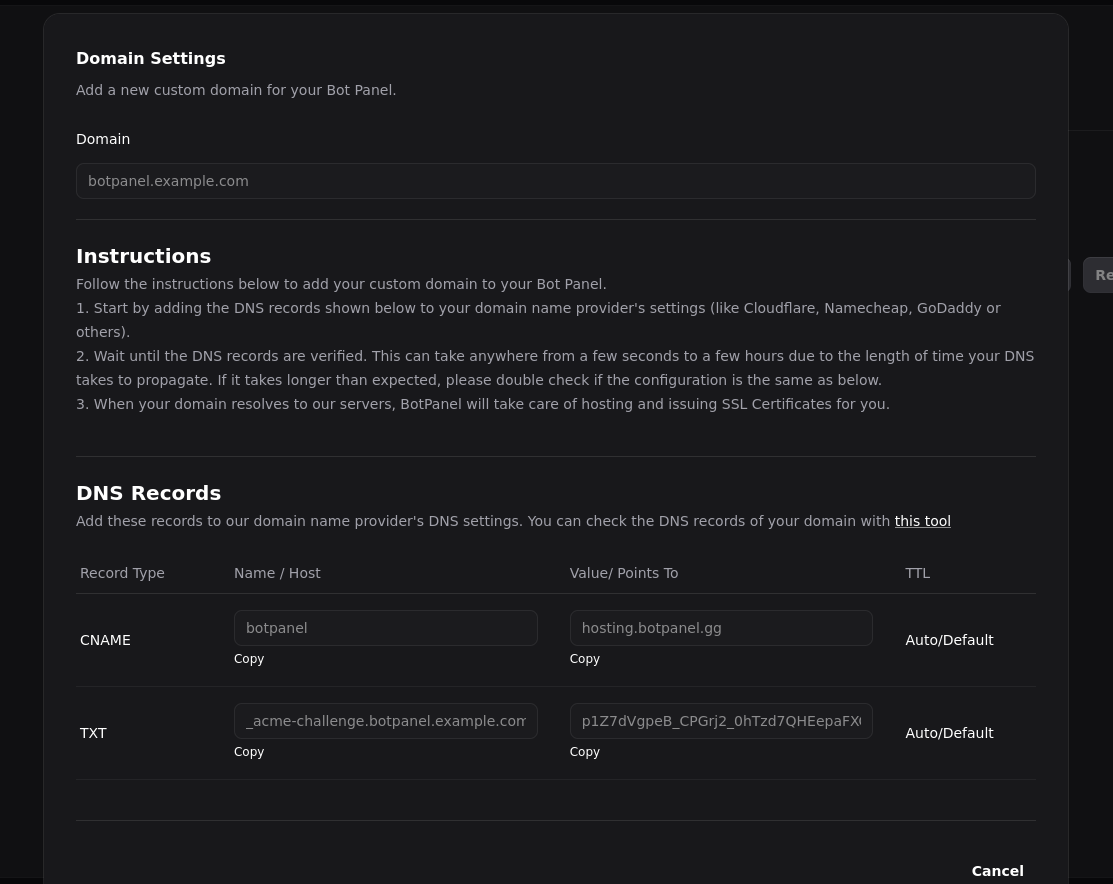
{% step %}
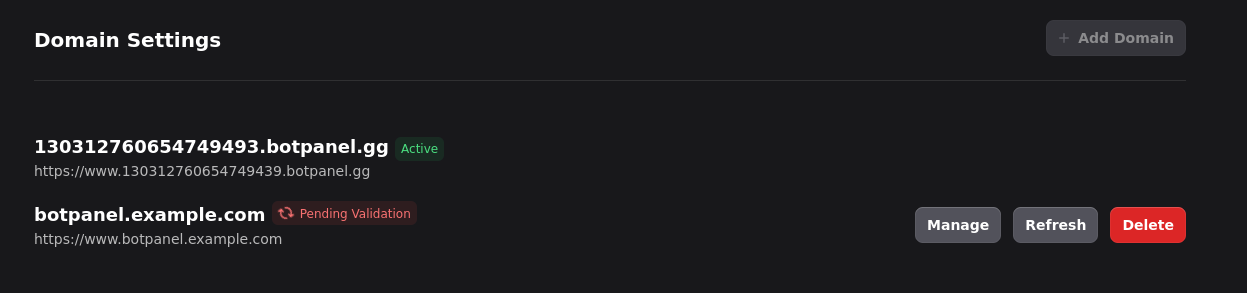
Now click the Manage button to view the DNS records you will later need to add to Cloudflare in order to verify your domain and link it to the BotPanel. You should see something like this:

Using a subdomain:
{% endstep %}
{% endstepper %}
You will need the information provided to you similar to the ones on the screenshot later in the NameCheap DNS configuration guide below.
## **Configuring DNS on Cloudflare**
{% stepper %}
{% step %}
Login into your CloudFlare account and select the domain you have setup DNS for on the BotPanel in the previous guide. You can do this by going to the Account Home tab and select the domain.
{% endstep %}
{% step %}
Visit the Overview tab in your domain management page and select the DNS Records in the DNS options on the right.
{% endstep %}
{% step %}
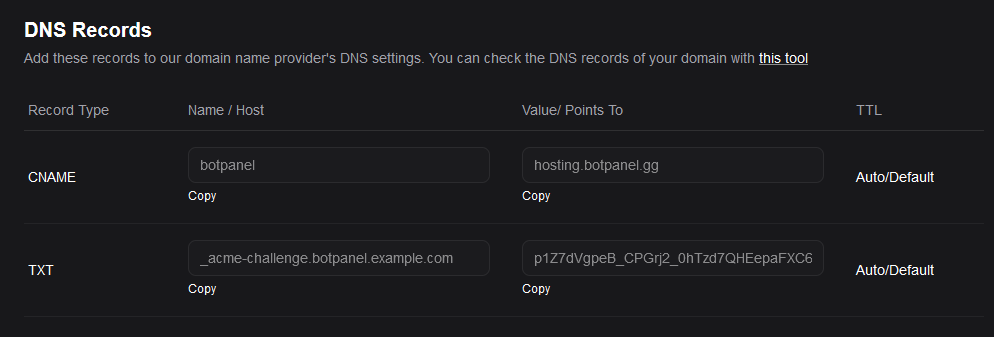
Add the records provided to you on the BotPanel under the DNS tab in your domain settings to the NameCheap ( Step 2 ).
The records provided to you on the BotPanel should look something like this

Using a subdomain:
{% endstep %}
{% step %}
Add the **CNAME** record using the Add Record button and add the Name/Host and the Value/Points provided to you on the BotPanel for the CNAME record.
Using a subdomain:
{% endstep %}
{% step %}
Now let's add the **TXT** record using the Add Record button again and add the Name/Host and the Value/Points provided to you on the BotPanel for the TXT record.
{% hint style="warning" %}
Please give the newly created records some time to take effect in some rare cases it could take up to 24 hours.
{% endhint %}
{% endstep %}
{% step %}
Go back to the BotPanel DNS tab after a while and check if you linked your domain successfully, if you did you should see something like this:
{% endstep %}
{% endstepper %}
Congrats! You've successfully setup your domain to work with BotPanel.
{% hint style="info" %}
If you have any questions, please check out our [FAQ](https://docs.botpanel.gg/domain-setup-guides/faq) and [Guidelines & Contact](https://docs.botpanel.gg/guidelines-and-contact) for more information.
{% endhint %}
---
# Agent Instructions: Querying This Documentation
If you need additional information that is not directly available in this page, you can query the documentation dynamically by asking a question.
Perform an HTTP GET request on the current page URL with the `ask` query parameter:
```
GET https://docs.botpanel.gg/domain-setup-guides/guides/cloudflare.md?ask=
```
The question should be specific, self-contained, and written in natural language.
The response will contain a direct answer to the question and relevant excerpts and sources from the documentation.
Use this mechanism when the answer is not explicitly present in the current page, you need clarification or additional context, or you want to retrieve related documentation sections.